


Photeeq Lens Flare: How to Add Stunning Light Effects to Your Photos
Photography has always been about capturing light in creative ways. Sometimes, the magic of light doesn’t happen naturally in the shot, but can be added later during post-processing. This is where the Photeeq lens flare feature comes in, offering photographers and editors a simple yet powerful way to add a cinematic touch to their images. Whether you’re enhancing a sunset, adding drama to a portrait, or giving your landscape that ethereal glow, lens flare can transform the feel of your work.
In this article, we’ll explore what Photeeq lens flare is, how to use it effectively, and the tips and tricks you need to create professional-quality light effects without overdoing it.
Understanding Photeeq Lens Flare
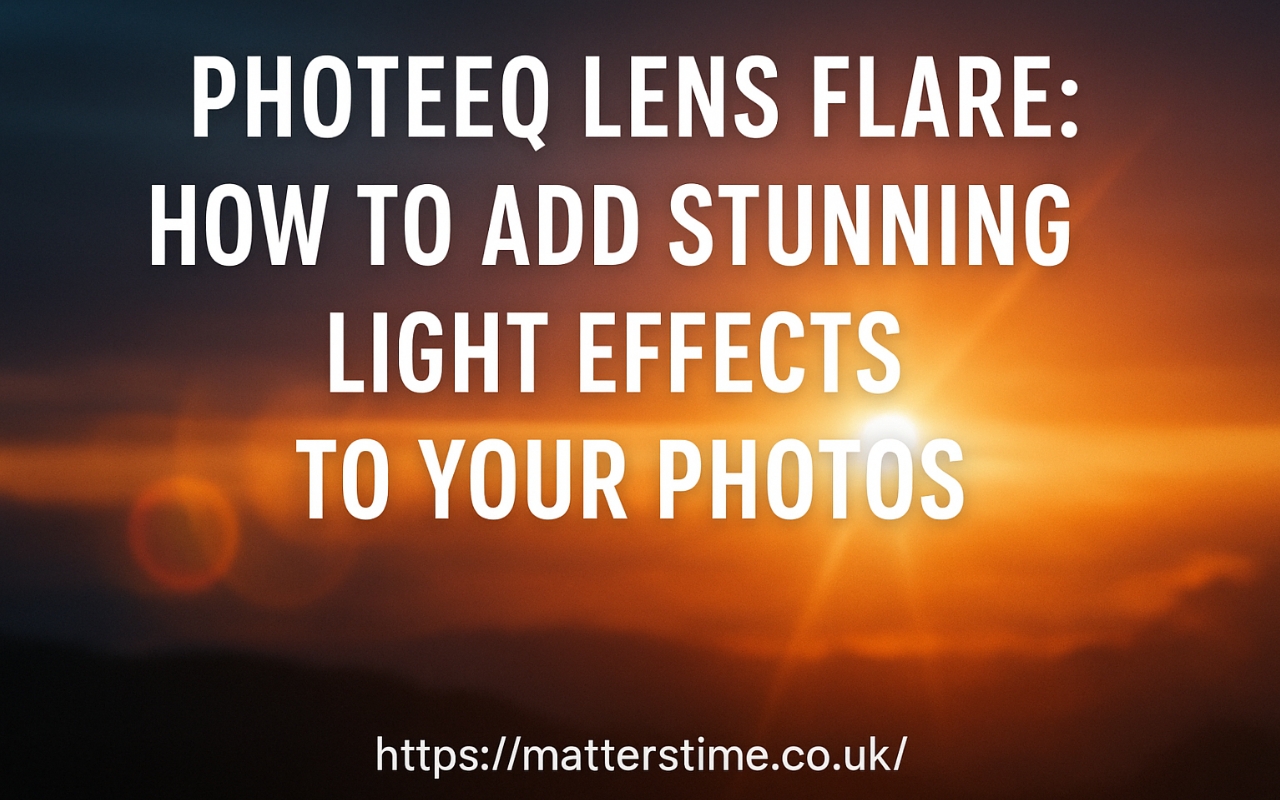
The Photeeq lens flare tool is a post-processing effect that mimics the look of light scattering through a camera lens when pointed toward a strong light source, such as the sun or a street lamp. In real-world photography, this effect happens when bright light enters the lens at an angle, creating circles, streaks, or starbursts of light. While natural lens flare can be unpredictable, Photeeq allows you to create and control it with precision.
Photeeq’s algorithm replicates these optical artifacts in a way that looks authentic, giving you the freedom to place the flare exactly where you want it, adjust its brightness, and choose from different flare styles. This means you can add drama to a cloudy sky, give depth to a flat image, or highlight a subject without needing to shoot in challenging lighting conditions.
Why Use Lens Flare in Photography?
Before diving into the how-to, it’s important to understand the “why” behind using Photeeq lens flare. When used tastefully, lens flare can:
- Add Atmosphere – A warm flare can make a winter photo feel like a summer memory.
- Enhance Storytelling – Flares can convey romance, nostalgia, mystery, or excitement.
- Draw Attention – A flare can subtly lead the viewer’s eyes toward the main subject.
- Create Cinematic Vibes – Many film directors use lens flare for emotional or dramatic effect.
However, overusing lens flare can make a photo look artificial or distracting. The key is balance — enough to enhance, but not so much that it steals the show.
Getting Started with Photeeq Lens Flare
To begin using Photeeq lens flare, you’ll need access to the Photeeq plugin or tool within your preferred photo editing software. Once installed, follow these basic steps:
- Open Your Image – Choose a photo where additional light would feel natural, such as landscapes, portraits, or cityscapes at dusk.
- Select the Lens Flare Tool – Navigate to the Photeeq effects menu and select “Lens Flare.”
- Position the Flare – Click and drag the flare to the area where your light source would logically be.
- Adjust the Settings – Modify brightness, size, shape, and color temperature to match the tone of your image.
- Fine-Tune – Zoom in to check edges and make sure the flare blends seamlessly with the environment.
These steps create a foundation, but mastery comes from knowing when to apply the effect and when to hold back.
Choosing the Right Type of Lens Flare
One of the strengths of the Photeeq lens flare feature is its variety of styles. You’ll typically find options like:
- Circular Orbs – Great for dreamy, soft light scenes.
- Starburst Rays – Perfect for high-drama sunsets or urban lights.
- Horizontal Streaks – Commonly used in cinematic action shots.
- Custom Shapes – Some flares can be adjusted into bokeh-like effects for creative flair.
The type of flare you choose should align with the mood of your photo. For example, a soft orb flare works beautifully in a romantic portrait, while a sharp starburst might suit an adventurous mountain scene.
Color and Brightness Adjustments
Getting the color and brightness right is critical for realistic results. If your photo has warm tones (like during golden hour), your Photeeq lens flare should match that warmth with golden or orange highlights. For cooler tones (like moonlit or snowy scenes), opt for subtle blues or whites.
Brightness should be realistic too. If your light source is subtle, an overly bright flare will feel out of place. Conversely, a powerful midday sun might require a more intense flare to feel authentic.
Avoiding Overuse and Maintaining Realism
While it’s tempting to add large, colorful lens flares to every photo, overdoing it can make your work look amateurish. Here are some common mistakes to avoid:
- Placing flares without a light source – This breaks realism.
- Using overly saturated colors – Unless for a creative effect, stick to believable tones.
- Covering your main subject – Lens flare should enhance, not obscure.
- Repeating the same style in every photo – Variety keeps your portfolio fresh.
Remember, subtlety often has more impact than exaggerated effects.
Creative Applications of Photeeq Lens Flare
While realism is important, creativity should never be stifled. Here are some fun, artistic ways to use Photeeq lens flare:
- Dreamy Portraits – Add a gentle flare to create a nostalgic or romantic mood.
- Fantasy Landscapes – Use exaggerated flares for surreal, otherworldly scenes.
- Event Photography – Enhance concert or festival photos with vibrant light streaks.
- Street Photography – Add drama to night shots with neon-inspired flares.
By experimenting with placement, opacity, and blending, you can turn ordinary images into works of art.
Technical Tips for a Professional Finish
To take your Photeeq lens flare editing to the next level:
- Use Layer Masks – This allows you to control exactly where the flare appears.
- Blend with Existing Light – Match direction and intensity to avoid visual confusion.
- Check at Multiple Zoom Levels – What looks good zoomed in might look unnatural when viewed full-screen.
- Test on Different Screens – Colors and brightness can vary between monitors and mobile devices.
These small steps can make the difference between a good edit and a truly professional one.
Final Thoughts
The Photeeq lens flare effect is a powerful tool for photographers and digital artists who want to enhance their images with light. When used thoughtfully, it can bring warmth, drama, and depth to your photos, elevating them from simple captures to emotional works of art. The key is to balance creativity with realism — let the flare complement your subject rather than compete with it.
With practice, you’ll develop an instinct for when a photo needs that extra touch of light and how to apply it seamlessly. So go ahead, open up your editing software, experiment with Photeeq lens flare, and watch your photos shine brighter than ever.
Read more: Contact Designmode24 com: Your Gateway to Creative Solutions